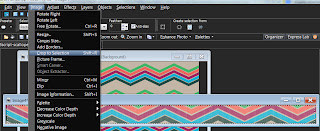
Click on the images to make them bigger.
First open the pattern paper and select a section of it all the way across. Copy and paste as a new image.
Select> All.
Select > Modify > Contract 10
Select > Invert
Effects > Texture > Blinds settings below:
Select > Invert
Effects > Texture > Blinds settings below:
Image > Crop to selectiong
Image > Resize to 12 inches
File > Export > JPEG Optimizer
Now you're done, but you could change it up a bit if you want a little more advanced look. You will need a plugin for this last step - if you want to highlight your ribbon and make it look 'more real'. Otherwise, you can just make the ribbon. The plugin is a freebie - that's the good news. The bad news is that the newer PSP programs are having a hard time running with the old plugins. Here is what I did:
- Downloaded Greg's Pool Shadow here.
- Place it in your Plugins folder in the program itself - NOT plugins in MY PSP in your documents.(I have windows 7) The directory is C:\Program Files\Corel\Corel PaintShop Photo Pro\X3\PSPClassic\Languages\EN\PlugIns
- Follow any directions here if the plugin is not working.
Hope you enjoy making tons of ribbons!!


Thanks for this tut, I love it!!
ReplyDeleteThanks so much for taking the time to post this. Will have to look more closely to see if I can adapt for a different program!
ReplyDelete