I love pearls and this tut can be used to make any color you wish, then put them in a tube and use them to make frames, alphas and more!
Click on the images to make them bigger.
Open a new image using the settings in the image below:
Click on the images to make them bigger.
Open a new image using the settings in the image below:
Select a circle using the selection tool with the setting
below. Select the biggest circle you can in your image. Fill with your desired
pearl color.
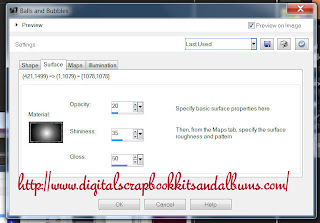
Effects > Artistic Effects > Balls and Bubbles Do not
check anything on the Maps tab. The other tabs should be filled out like these:
Save these settings in you Balls and Bubbles tool as 'Pearl'.
Now you have a pearl preset ;)
Selections > Modify > Contract: 5
Selections > Invert
Selections > Invert
Click your delete button and get rid of that too dark edge.
Selections > Invert
Image > Crop to selection
Because we want to turn our pearl into a tube, we have to
know its exact size.
Image > Resize to the settings below:
Next you'll need to export the picture tube.
File > Export > Picture Tube
Use the setting below... you can always change the size and how it comes out of the tube when you are using the tube, you are simply setting the tube defaults here:
After you are done, open a new image and play with your tube! You may need to restart PSP depending on the version you are using.


No comments:
Post a Comment